
1. Create a new transparent image at least 400 X 400, but 500 X 500 is OK, with 16 million colors. Save this as wreath.psp. Remember to save often!
2. In your layers pallette double click on layer 1 and rename it BG (for Background)
3. Add a new raster layer and name it guide lines. This layer is for guide lines that we will delete later, so it is not necessary to be absolutely precise.
4. Set foreground style to solid color (click on that little triangle and choose the paintbrush.), then set the color to black from the pop up color pallette.
5. Set the background style to null (click on the background triangle and choose the circle with the line through it.) Both texture boxes should also be set to null.
6. Activate your Preset Shapes tool, and select ellipse:
Retain style = unchecked
Antialias = checked
Create as vector = unchecked
Line width = 1
Line style = solid/default
7. Place your curser at 200 X 200 for center of 400 pixel image or 250 X 250 for a 500 pixel image. While holding down the shift key and right clicking the mouse draw a circle - watch numbers in the corner and bring circle to 300 X 300 or 350 X 350 size. ( a little over or under not critical)
Draw a second circle starting in the same place and stopping at 350 x 350 or 400 x 400.
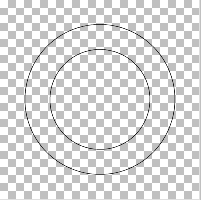
9. Add a new Vector layer and name it Bow
10. Activate Preset Shapes and change Create as Vector to checked, and line width to 4
11. Draw a small circle in the bottom area of the wreath circles. Hold down shift and right click the mouse. Deselect.

12. Draw another circle on the right or left, and make it larger - do not deselect.
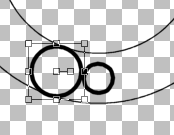
13. Activate the Vector Object Selector tool (the square with nodes in the corner and a cursor in the center. On the Tool Options pallette select Node Edit. You will see the dark line disappear and four little boxes appear. These are the nodes. We are going to select one, click on it with our mouse and holding down the mouse key drag it to where we want it. Select one near the top close to the bow. Drag it over to touch the center of the bow. Then select another node near the bottom of the bow center and drag it over to touch the center. Now drag the lower of the remaining nodes down until it begins to look like a nice bow shape.
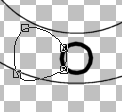
14. When you have it like you want it, right click on the shape with your mouse and choose quit node editing
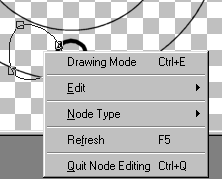
15. If you don't like the way it looks just go to node edit again and play with it some more. But when you finally finish with the node editing do not deselect.
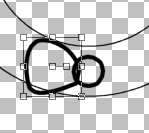
16. Now on the Vector Object Selector Tool option pallette select Properties.
17. In the Vector Properties pop up box in the Styles box click the triangle in the fill box to change it to pattern (the dots) Then click on the box itself and call up the pattern selector. In the box showing the pattern click on the triangle in the side bar and get your pattern choices. Select the red color you chose from the Spectrum Glass site and have minimized at the bottom of your work area. Be sure to set the angle to 90 or whatever looks good for the pattern you chose and scale to 100%. Click OK. then click OK again. That side of your bow should now contain red glass. Do not deselect.
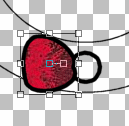
18. Select Edit/Copy or Control + C, then Edit/Paste/as a new layer or Control + L. Go to Image/Mirror to get the other side. Then find the mover in the center and move it into position next to the center bow. Deselect.
19. Now in the layer pallette click the little + in front of layer 3 and open it up. Drag the ellipse down to layer 2 and then delete the empty layer by right clicking on layer 3 and select delete.
20. While you have the bow layer open highlight the bottom ellipse (the bow center) and after it is selected go to Properties and fill with red glass using the same settings you had for the side part of the bow. Deselect.
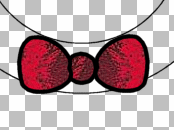
21. Now we need to make the lower ribbons. Activate the Preset Shapes and select rectangle, keeping the rest of the settings the same as before. Draw a small rectangle under the center of the bow. Don't worry too much about the exact size.
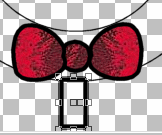
22. Activate your Vector Object Selector tool (the little square with the curser in it) and go to node edit again. There are 4 nodes again, move the top 2 together and up to the right edge of the center of the bow, and pull the bottom ones apart into one down lower than the other to form a nice ribbon shape. Then right click and quit node editing. Do not deselect.
23. Go to Edit/copy or Control + C, then Edit/Paste/as a new layer or Control + L. Use the Image/ Mirror again to make the other side, then move it into position.
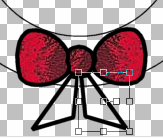
24. Fill with red glass as before.
25. Then in the layer pallette, drag down the second rectangle to the bow layer. Delete the empty layer, then click on the (minus)- sign next to the bow and close up the bow section. Save what you have done as wreath.psp
26. Let go of the mouse. Take a deep breath, get up and move around. Look at your bow - you are doing a great job!
NOW YOU HAVE A DECISION TO MAKE!
You can add the wreath, fill it with dark green glass and say you are finished. Click on Plain or the wreath to go to that page.
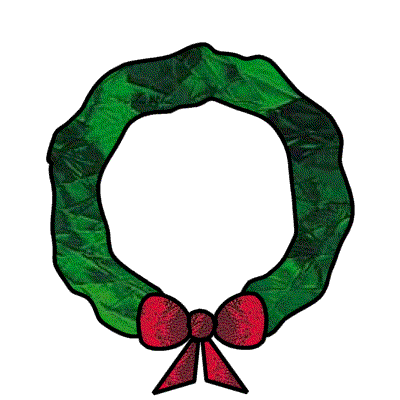
Plain
You can add a candle. Click on Candle to go to those instructions.
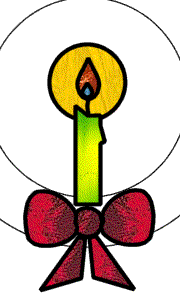
Candle
You can finish with leaves and baubles, with or without the candle. Click the Wreath to go to those instructions.

Wreath Fancy