This tutorial is written for PSP v7
There are many methods for working with pictures of this sort. This is only one of those methods, but it is the way I have found works best for me. Don't be put off by how long this tutorial seems. It is long because I talk too much and try to explain everything as if you are just starting with PSP. Those of you who are farther along can just read through this, and maybe pick up a hint or two, and apply it to how you work.
For this tutorial you will need:
PSP 7 (will probably work in 6 but I have not tried it yet)
A Coloring Book picture. Go to this site and select a Pooh picture. Right click and save it in your .psp folder.
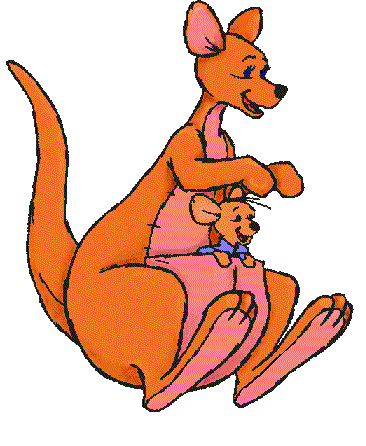
You may download the Kanga & Roo picture I used here.
PREPARATION
1. After you have selected a picture, open it in your workspace.
2. Duplicate by going to Windows || Duplicate.
3. Close the original!
4. Resize - if your image is not size [1:1] in the blue bar above the picture
5. Now we need to change this picture to 16 million colors so we can work on it. Go to Colors || Increase Color Depth | 16 Million Colors (24 bit).
6. Activate your
- Match mode: RGB Value
- Tolerance: 100
- Feather: 0
- Sample Merged: unchecked
7. Look for a nice thick part of the line and give it a click. Look carefully at the marching ants. Some details are missing. Hold down the shift key and click each missing detail till all parts of the picture have marching ants. (Make sure the marching ants are just on the black lines and NOT around the outside edge of the frame.) This is the most difficult part. If it is around the outside edge try clicking undo till it comes off the outside edge and then try to pick up the other missing details. Sometimes you just have to Select || None and start over. And sometimes you have to leave out details that just won't pick up without making it go around the outside edge. When you have ants around all the parts of the picture you want copy it. Edit || Copy or Control + C. Then Edit || Paste | As New Image or Control + V.
8. Check to be sure you got everything. If you missed something important (an eye maybe) then activate the main source image and Selections || Select None or Control + D to get rid of the marching ants. Activat your Magic Wand again and click on the missing part. Copy this part Edit || Copy or Control + C and this time paste it as a new layer. Edit || Paste | As a New Layer or Control + L. Move it into position.
9. Close source image as it is no longer needed. (You don't need to save changes to that image - click No when PSP asks you if you want to save it.
10. BUT, you do want to save the new window with the outline. Save it as a .psp so it will save your layers and remember to hit the save button often!
11. If you had to go back and add other pieces you may have more than one layer in your layer pallette. Let's condense that by going to Layers || Merge Visable.
12. Rename merged layer in your layer pallette by double clicking on merged and changing name to outline.
13. Add a new layer and name it background, then pull it under the outline layer.
14. One more item: Being an "Old Dog" I often need to zoom in so I can see to do details. So, I like to have a regular size window to keep on the side that shows me how I am coming along. To do this, go to Window || New Window. Now, everything you do to the image you are working on will show in the second window also. (This step is not necessary - if you have great eyesight and do not need to zoom in!)
Before we actually start coloring I am going to digress a bit and tell you a little bit about some of the tools and their settings that we will be using.
THE PAINTBRUSH
The paintbrush has so many possibilities I am going to have to confine myself to only mentioning the plain ones I am using. But, by changing the settings you can "paint" a color with a texture, a pattern, make it look like chalk, or crayon or pencil. Oh, so many things! We however are going to use the following settings:
- Shape = Round
- Size = depends on the area to be covered. The larger the number the larger the brush.
- Hardness = 50
- Opacity = 100
- Step = 25
- Density = 100
- Build up = unchecked
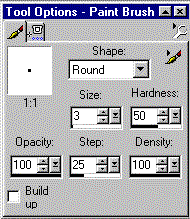
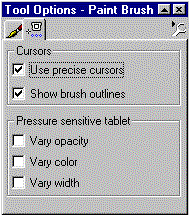
Click over to the tool options and check both Use precise cursors and show brush outline. This lets you see exactly where your brush is centered and what size the brush is and what it will cover. Change brush size as needed to get into small places. For really tiny details I might zoom in 5 and then set brush size for 1, 2, or 3 pixels.
THE RETOUCH TOOL
This is a very handy tool that is often overlooked. With it you can "paint" with an effect rather than a color. But it is very handy for shading. The settings we will be using are:
- Shape = round
- Size = depends what you are doing.
- Hardness = 0
- Opacity = 25
- Step = 25
- Density = 25
- The main settings we will use are:
- Lighten RGB
- Darken RGB
- Smudge
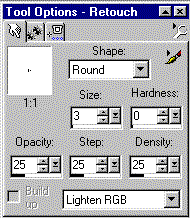
You might want to play with some of the others to get special effects. And be sure to check Use precise cursors and Show brush outlines on this tool also.
ON TO THE COLORING
15. In your layer pallette be sure background is highlighted, then add a new raster layer.
16. It will be between the background and the outline. You may name it if you like, but the main thing is to make new layers for each new color or area you are working on. Then, if you change your mind later and want to change that color it is easier to get to it to work on. When you finish and you are sure you like it we are going to merge the layers. You might name the layers by color, or area, like brown or arm.
17. Set your foreground color to what ever color you need for what you are going to color. I am going to color a picture of Kanga and Roo, so I selected an orange/brown that I thought would be a good kangaroo color (R 244, G 114, B 36). (Tip - Did you know that you can set the color pallette for most of the colors you think you are going to use. Choose up to 10 colors. Then right click on the color selection box instead of left clicking. A small box called recent colors
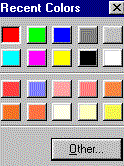 will pop up and you can select your color from there. This is great for what we are doing, as you don't have to remember the color settings as you go back and forth.)
18. I am starting on an area that is large, so I set my paintbrush for size 20 to start. Be sure you are on the new layer between background and outline. Don't try to get too close to the edge with this big brush. That is why we set it not to build up. So we could take care of the edges later. Just fill in all of the center area that you want to be that color. Notice that you can go right over the black lines and they still show, because we are on a layer under the black lines.
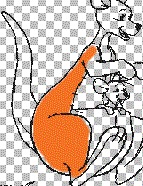
19. Now, here is where that extra window is really going to come in handy. On your working image zoom in at least 3:1. I like 4:1 or even 5:1 most of the time. Reset your paintbrush size to 5, 4, or 3. Depends on the detail area you are working on. Then go around the edges and fill in. Every time you let up on the mouse button you can see the added color in the overall window, and that helps you see where to go in the zoomed in picture. Don't worry too much if you get out of the lines, that is what your eraser is for. We will clean up in a minute. Try to lay down a complete smooth coverage of the color you are working on.
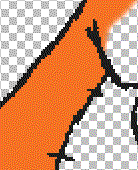
20. After filling in all the color in the area you are working on, while you are still in zoom, activate your
- Shape = Round
- Size = 4, 3, 2, or even 1
- Hardness = 50
- Opacity = 100
- Step = 1
- Density = 100
- Build up = unchecked
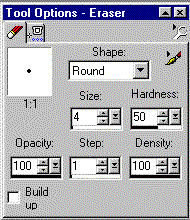 Carefully remove any paint out of your lines.
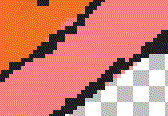
21. Continue laying in color till you have finished all the area you want to be that color. Notice on the ear how I left the area that will be another color. We will blend that later.
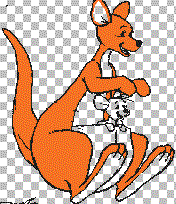
22. You can leave the color flat like it is, or you can add shading.
23. To add shading activate your retouch tool. Set size to 5 and to Darken RGB in the drop down box. Decide where you want the shadows and stroke the mouse over that area. With the settings I gave you this is a very subtle change. You might need to go over the same area 4,5, or 6 times to get it as dark as you want it. While holding down the left mouse key just keep going over the area till you like the look.
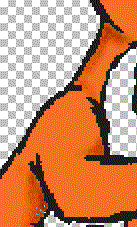
25. Now, change the setting of the retouch tool to "Lighten RGB" and add some highlights.
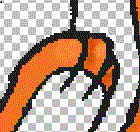
26. Add a new layer and pick the next color you want to work on. Apply it the same way and shade the same way.
27. Some hints for certain areas like the ear. If you are going to want to blend some colors together they need to be on the same layer. Use the smudge setting or the push setting of the retouch tool to blend the colors together. Pushing and pulling the two colors into each other.
28. To add the color to the eye of my large Kangaroo, I went to the outline layer and very carefully with the eraser erased some of the black so that I could add a spot of color to the eye. Put the spot of color on a separate layer below the outline layer.I made them very pronounced so that you could see them. But a very subtle shade could be made by only erasing 1 pixel and adding a less obvious color.

29. When you have finally finished the whole picture to your liking, save it. Then go to Window || Duplicate.
30. Close your .psp copy and then on the duplicate image go to Layers || Merge | Merge Visable And merge all the layers so that you can save the final picture.
31.Export it as a Transparent .gif if you want to apply it to a page, or a regular .gif or .jpg if you want the white background. If you want a different background, add a layer and pull it below the merged layer and finish any way you want.
THIS IS A NEWLY WRITTEN TUTORIAL. IT HAS NOT BEEN PROOFED YET. REPORT ANY PROBLEMS TO ME IMMEDIATELY SO I CAN FIX THEM. Thank you!

